How To Install Ruby using Ruby Version Manager (RVM) on MacOS Mojave
A step-by-step guide

Prerequisites
- How to use the Terminal aka Bash
System Requirements
- MacOS Mojave 10.14.2
2. Terminal (>= 3.2.25 for bash 3 or >= 4.2 otherwise)
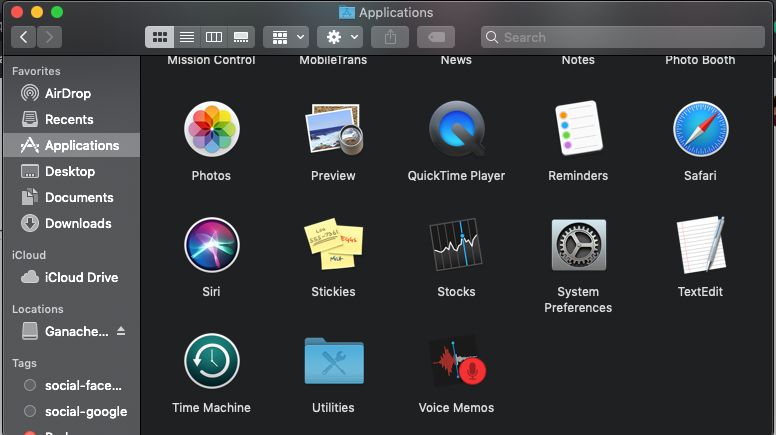
To locate the Terminal, open Finder on your MacOS, click on Applications, locate the Utilities folder as shown in the image below, open the folder you would see the Terminal among other things inside, click on the terminal to launch it.
Ruby comes prepackaged with the MacOS, to see the system’s prepackaged ruby enter the following command into the terminal:
which rubyOutput
The best way to install Ruby is using the Ruby Version Manager. RVM lets you switch between multiple versions of Ruby, this is useful when you have to use a specific version of Ruby in a development environment. Please avoid using the prepackaged Ruby that comes with the MacOS, this is because its version may be outdated.
The Benefits of using RVM includes;
- RVM installs each version of Ruby in a hidden folder in your home folder so each version of Ruby you install doesn’t affect the system Ruby. This is also known as the Single-user installation.
- Gems installed by RVM-managed versions of Ruby are installed within the hidden folder in your home folder containing that version of Ruby.
- You won’t need to use
sudoto install gems. Installations requiringsudoare referred to as Multi-User Installation.
For a more thorough guide on the different types of installation for RVM, refer to the RVM Documentation.
Ruby comes prepackaged with the MacOS, to view the prepackaged ruby enter the following command into the terminal:
To check the version of Ruby on your macOS, enter the following command:
ruby -vThe RVM installation page has comprehensive instructions for installing RVM that work on MacOS.
Getting Started
Install GPG or GPG2
The first step is to install a public key. However, as the install page notes, you might need gpg or gpg2. Mac OS X doesn’t ship with gpg so before installing the public key, you’ll need to install gpg. I installed gpg with Homebrew:
brew install gnupgAfter you’ve installed gnupgyou can install the mpapis public key using this command:
gpg --keyserver hkp://ipv4.pool.sks-keyservers.net --recv-keys 409B6B1796C275462A1703113804BB82D39DC0E3 7D2BAF1CF37B13E2069D6956105BD0E739499BDBYou might encounter problems with a key server, if this happens, replace the server URL with any of the listed below;
hkp://pool.sks-keyservers.net
hkp://pgp.mit.edu
hkp://keyserver.pgp.com
Installing RVM
To install the stable version of RVM using this command below, this command installs ruby as a single user, this means it installs ruby to my home folder.
\curl -sSL https://get.rvm.io | bash -s stableThe output should look similar to this;
Owanates-MacBook-Pro:~ owanate$ \curl -sSL https://get.rvm.io | bash -s stableDownloading https://github.com/rvm/rvm/archive/1.29.10.tar.gzDownloading https://github.com/rvm/rvm/releases/download/1.29.10/1.29.10.tar.gz.ascgpg: Signature made Wed Mar 25 22:58:42 2020 WATgpg: using RSA key 7D2BAF1CF37B13E2069D6956105BD0E739499BDBgpg: Good signature from "Piotr Kuczynski <piotr.kuczynski@gmail.com>" [unknown]gpg: WARNING: This key is not certified with a trusted signature!gpg: There is no indication that the signature belongs to the owner.Primary key fingerprint: 7D2B AF1C F37B 13E2 069D 6956 105B D0E7 3949 9BDBGPG verified '/Users/owanate/.rvm/archives/rvm-1.29.10.tgz'Installing RVM to /Users/owanate/.rvm/Adding rvm PATH line to /Users/owanate/.profile /Users/owanate/.mkshrc /Users/owanate/.bashrc /Users/owanate/.zshrc.Adding rvm loading line to /Users/owanate/.profile /Users/owanate/.bash_profile /Users/owanate/.zlogin.Installation of RVM in /Users/owanate/.rvm/ is almost complete:* To start using RVM you need to run `source /Users/owanate/.rvm/scripts/rvm`in all your open shell windows, in rare cases you need to reopen all shell windows.Thanks for installing RVM 🙏Please consider donating to our open collective to help us maintain RVM.👉 Donate: https://opencollective.com/rvm/donate
Run the following command in terminal;
echo "source $HOME/.rvm/scripts/rvm" >> ~/.bash_profileReload Terminal
Closeout your current shell or terminal session and open a new one (preferred). You may load RVM with the following command:
source ~/.rvm/scripts/rvmIf installation and configuration were successful, RVM should now load whenever you open a new shell. This can be tested by executing the following command which should output rvm is a function as shown below.
type rvm | head -n 1
# rvm is a function
Enter the following command to display a list of all known rubies.
NOTE: RVM can install many more Rubies not listed.
rvm list knownOutput
rvm list known# MRI Rubies[ruby-]1.8.6[-p420][ruby-]1.8.7[-head] # security released on head[ruby-]1.9.1[-p431][ruby-]1.9.2[-p330][ruby-]1.9.3[-p551][ruby-]2.0.0[-p648][ruby-]2.1[.10][ruby-]2.2[.10][ruby-]2.3[.8][ruby-]2.4[.9][ruby-]2.5[.7][ruby-]2.6[.5][ruby-]2.7[.0]ruby-head....# for forks use: rvm install ruby-head-<name> --url https://github.com/github/ruby.git --branch 2.2
If the version of Ruby you intend to use is already listed in the output above, go ahead and enter this command in terminal:
rvm use [version no]Replace version no with the ruby version, e.g rvm use 2.1
Install a Specific Version of Ruby
To Install a specific version of Ruby (eg 2.6.3):
rvm install 2.6.3Output:
Owanates-MacBook-Pro:~ owanate$ rvm install 2.6.3No binary rubies available for: osx/10.14/x86_64/ruby-2.6.3.Continuing with compilation. Please read 'rvm help mount' to get more information on binary rubies.Checking requirements for osx.Installing requirements for osx.Updating system.......Installing required packages: autoconf, automake, libtool, pkg-config, coreutils, libyaml, readline, zlib...........Certificates bundle '/usr/local/etc/openssl@1.1/cert.pem' is already up to date.Requirements installation successful.Installing Ruby from source to: /Users/owanate/.rvm/rubies/ruby-2.6.3, this may take a while depending on your cpu(s)...ruby-2.6.3 - #downloading ruby-2.6.3, this may take a while depending on your connection...% Total    % Received % Xferd  Average Speed   Time    Time     Time  CurrentDload  Upload   Total   Spent    Left  Speed100 13.8M  100 13.8M    0     0  47801      0  0:05:03  0:05:03 --:--:-- 53787ruby-2.6.3 - #extracting ruby-2.6.3 to /Users/owanate/.rvm/src/ruby-2.6.3
.....Install of ruby-2.6.3 - #completeRuby was built without documentation, to build it run: rvm docs generate-ri
Enter the command below to instruct RVM to use the newly installed Ruby:
rvm use 2.6.3Output
Owanates-MacBook-Pro:~ owanate$ rvm use 2.6.3Using /Users/owanate/.rvm/gems/ruby-2.6.3
To check if everything worked correctly:
ruby -vruby 2.6.3p62 (2019-04-16 revision 67580) [x86_64-darwin18]which ruby/Users/owanate/.rvm/rubies/ruby-2.6.3/bin/ruby
Optionally, you can set a version of Ruby to use as the default for new shells. Note that this overrides the ‘system’ ruby:
rvm use 2.6.3 --defaultFor more information, please refer to the Official RVM Documentation!
Congratulations! You’ve successfully installed RVM and also used RVM to install a specific version of Ruby.
Thanks for reading!!
